")


How to Set up Your New BNF FPV Drone
If you’ve just purchased a new BNF (Bind and Fly) drone, you’ll likely want to set it up exactly to your settings and preferences. This guide will cover everything from the basics of binding and beyond.
1. Binding and Configuring the Receiver
The first thing you’ll need to do is bind and configure the built-in receiver in your model. We’ll then test this in Betaflight, in the receiver tab to ensure our channels are set correctly.
Bind the receiver
First, determine the location of the reciever in your model. If you’re flying a micro drone (anything that can fit in your hand), chances are it will have an SPI receiver, which is built into the flight controller. Larger models will likely have an external receiver (Crossfire Nano, FrSky R-XSR etc).
Once you have located the receiver, look for a button that says ‘Bind’. If the buttons are not labelled, you may need to consult the receiver manual for instructions on where to find this. For most receivers, you will need to hold the button down while plugging in a battery, this will usually set the receiver into bind mode. You will need to consult your receivers manual for specific instructions on this.
Note on Crossfire: Crossfire Nano receivers (including SE) generally set themselves into bind mode when turned on. You do not normally need to press the bind button.
Note on DJI Air Unit: Watch this short video for binding instructions.
Check your bind in Betaflight
To confirm the receiver and transmitter are bound, we’ll use the Betaflight configurator software. Once you’ve downloaded and installed Betaflight Configurator, read ahead.
Ensure your model is disconnected from any batteries and locate the USB connection on the flight controller. Most of the time this will be micro-USB however some newer FCs will use a USB-C connector. Connect a USB cable from this port to your computer. You should see some LEDs light up on the flight controller once connected.
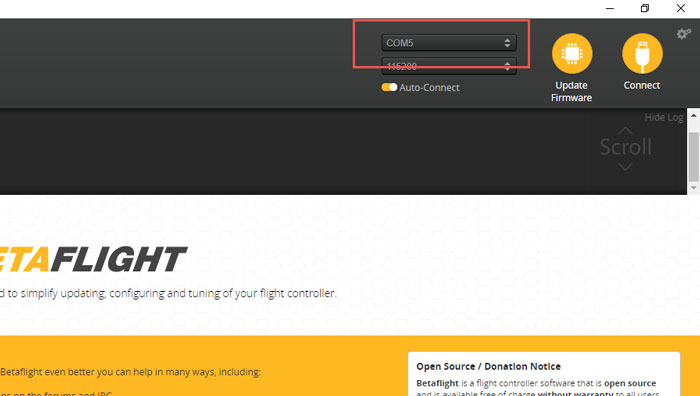
In the betaflight configurator, look in the top right side for the connect button. You may need to select the correct port manually to connect to your flight controller. Press the Connect button to connect to the flight controller.
Some PCs have trouble with the drivers needed for STM32 processors. You may need to download and install the ImpulseRC Driver Fixer tool if you cannot get it to connect.
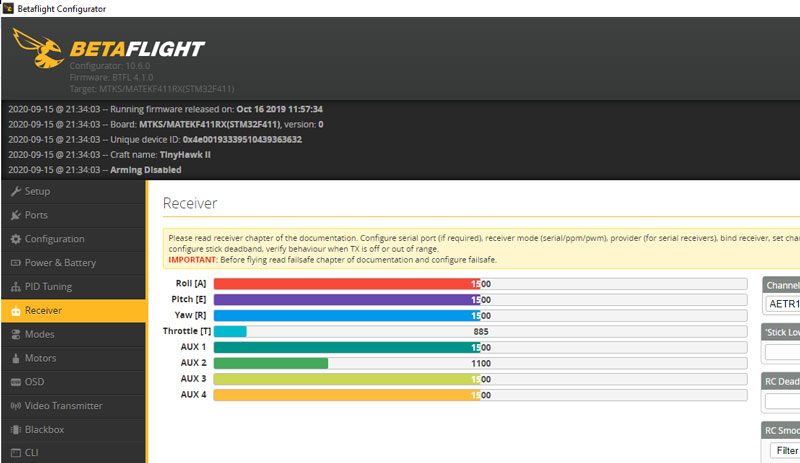
If you have followed all the above correctly, you should be presented with the betaflight Setup tab and a model of your drone.
Navigate to the Receiver tab for the next steps.
In the Receiver tab, you will see several coloured bars on the left hand side. These are the channels being transmitted from your radio. If you haven’t already, turn your radio on. If bound correctly, you should see these coloured bars move around when you move the controls on your radio. If none of the coloured bars move at all, your receiver is likely not bound, or hasn’t been setup in the Setup pannel correctly.
Note: All Bind and Fly models should have the receiver setup from the factory. If you have built your own model, you may need to configure this yourself before continuing.
Next, check that each channel lines up to the stick/control you are moving on the radio. Your throttle should move the throttle bar, roll move the roll bar etc.
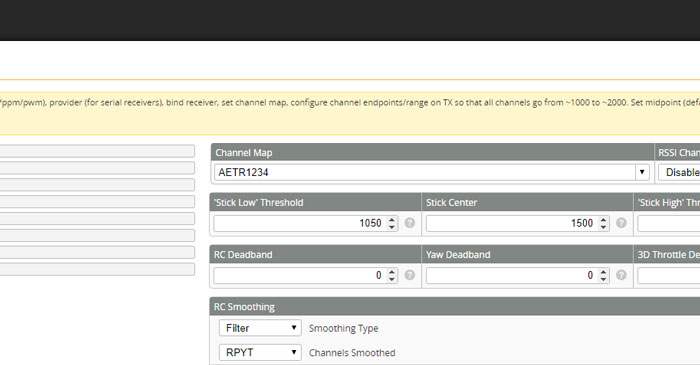
If you find that your channels are all mixed up, you may need to correctly set the Channel Map. To do this, select the text box with “AETR1234” or similar. You will need to change this and then press save to see the change take place. Generally your transmitter will only be operating in one of two modes, AETR or TAER. This acronym corresponds to the order of Throttle, Aileron, Elevation and Roll. You can manually edit this if none of the presets work.
Once you have confirmed your channels are all set correctly, you’re ready to move on to Switches and Auxiliary channels!
2. Configuring Auxiliary Channels
Auxiliary channels allow you to change your drone’s modes and set up an Arm switch. You drone will not be able to fly without an Arm Switch. Before configuring any modes in the Modes tab, we will need to ensure our auxiliary channels are working in the Receiver tab.
This part of the tutorial is done on your Radio Transmitter. Some radios such as the LiteRadio 2 and the Emax E6 transmitter will already have these setup by default. But generally if your radio transmitter has a screen, you will need to setup the switches yourself.
If you’re running an OpenTX radio such as the RadioMaster TX16S, Taranis QX7, or Taranis X9 Lite, you can follow this OpenTX guide to setting up some auxiliary channels:
After you’ve completed setting up the auxiliary channels, head back to the Receiver Tab in Betaflight Configurator to check they are working as expected. You should see some movement in AUX 1, 2, 3 and so on when the switches you step are moved.
3. Configuring Betaflight Modes
The final part of the tutorial before you get flying is to setup your modes for basic control of the drone. Different betaflight modes change the way your drone flies. Some beginners like to start on Angle mode to get a hang of the controls. Once you have mastered the basic controls of pitch/roll, you’ll quickly want to move on to Acro/Air mode, which is the standard for FPV flights.
The first mode you will need to setup is the ARM mode. This is a switch that tells the drone to ‘arm’ or enable the motors and begin spinning them. Always stay well clear of your FPV drone before arming it.
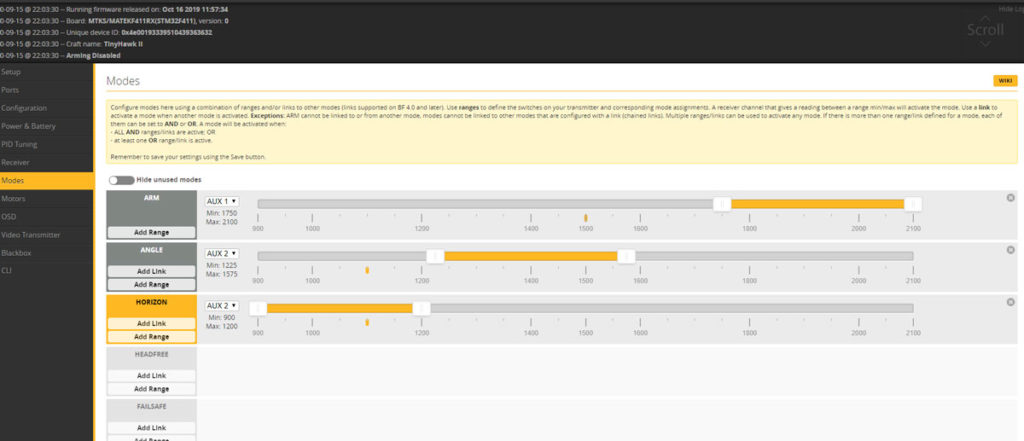
The above image shows some very basic modes which have been setup using the yellow bars. You can click “Add Range” to add these yourself. You will need to define an AUX switch for each mode. We like to set the ARM to AUX 1 and our modes including ANGLE and HORIZON to AUX 2. If your transmitter is turned on and receiving, you should see the yellow bar below each mode you have set up move when you move the switch. Don’t forget to scroll down and press Save before exiting!
Once you have completed all the above steps, your model is all set up and ready to fly!
You might also enjoy reading our guide on how to setup the Betaflight OSD.
Thanks for reading!